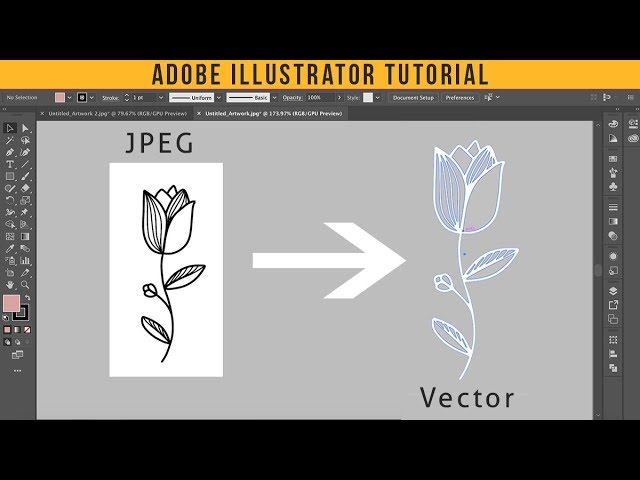
Converting a JPEG to a vector format used to require a professional designer, expensive software, and a lot of patience. Today, a growing number of online tools can handle this task quickly, without requiring any downloads or design expertise. The challenge is knowing which converters actually deliver clean, scalable output versus which ones leave you with a jagged, unusable mess. This guide breaks down the top solutions for converting JPEG images to vector formats, what to look for in a quality converter, and how to get the best results every time.
Why Vectorizing a JPEG Actually Matters
JPEG files are raster images, meaning they are made up of a fixed grid of pixels. When you scale them up, they blur and pixelate. Vector files, on the other hand, use mathematical paths to define shapes, which means they stay sharp at any size, whether displayed on a phone screen or printed on a billboard.
This distinction matters in a wide range of practical situations. If you need a logo for a business, artwork for merchandise, a graphic for a large-format print, or an icon for a web project, a JPEG simply will not hold up at scale. Vector formats like SVG, EPS, and AI are the standard for anything that needs to be reproduced across different sizes or platforms.
The good news is that vectorization technology has improved significantly. Tools that once required desktop software with steep learning curves are now available in your browser, often for free or at a low cost. The key is understanding what separates a strong converter from a weak one, and knowing how to set up your image before you start.
What to Look for in a High-Quality JPEG to Vector Converter
Not all online converters are created equal. Before you commit to a tool or a workflow, here are the qualities that distinguish a reliable vectorizer from one that will waste your time.
Output format flexibility. A strong converter should give you options. SVG is the most widely supported vector format for web use, but you may also need EPS or PDF depending on your printing or design workflow. Tools that only export in one format limit your options downstream.
Color and detail accuracy. The best converters analyze the color regions in your image and translate them into clean, smooth vector paths. Tools that struggle with this produce output full of stray nodes, color banding, or blurry edges that require extensive cleanup.
Control over tracing settings. More advanced converters let you adjust parameters like color count, path smoothing, and detail threshold. This level of control helps you dial in the right balance between precision and file size, which matters a lot for complex images.
Speed and file size limits. For professional use, a converter needs to handle reasonably large files without crashing or degrading quality. Some free tools impose strict file size caps or resolution limits that make them impractical for real projects.
No software installation required. The appeal of online tools is accessibility. The best converters work entirely in a browser with no plugins, downloads, or account creation required for basic use.
Top Tips for Converting JPEG Images to Vector Online
1. Start With the Cleanest Source Image You Can Find
The quality of your vector output is directly tied to the quality of your input. A blurry or heavily compressed JPEG will produce a noisy vector with messy paths and muddy colors. Before uploading anything, take a moment to assess your source file. If you have access to a higher-resolution version of the same image, use it. If not, consider running a basic sharpening pass or increasing the contrast slightly to give the converter cleaner edges to trace.
Converters work by identifying distinct regions of color and contrast. The sharper and more distinct those regions are in the original file, the cleaner and more accurate the resulting vector paths will be.
2. Simplify the Image Before Vectorizing
Complex photographs with hundreds of colors and subtle gradients are extremely difficult for any vectorizer to handle cleanly. If your JPEG has a lot going on, consider simplifying it first. Reducing the number of colors, removing busy backgrounds, or converting to a higher-contrast version can dramatically improve the output.
Posterizing an image (reducing it to a limited number of flat color values) before converting is a technique many designers use to get professional-looking vector results from photographic source material. Most basic image editors, including free web-based ones, support posterization.
3. Use Adobe Express for Straightforward JPG to SVG Conversion
For users who want a clean, reliable conversion without a steep learning curve, Adobe Express offers a dedicated jpg to svg converter that handles the process quickly and outputs a usable SVG file. It is particularly well-suited for logos, icons, illustrations, and other images with clear shapes and limited color palettes. The interface is straightforward, and the output can be downloaded and used immediately in web or design projects. Because it is browser-based, there is nothing to install, and the tool is accessible from any device.
Adobe Express is a smart choice for users who are already working in the Adobe ecosystem or who want a trustworthy, well-supported converter backed by professional-grade technology.
4. Adjust the Color Count to Match Your Image Complexity
One of the most important settings in any vectorizer is the number of colors used in the output. More colors produce more detailed results but also larger, more complex files. Fewer colors produce cleaner, simpler vectors that are easier to edit and faster to render.
For logos and icons, a color count between 2 and 8 is usually ideal. For more detailed illustrations, you might push that to 16 or 32. For photographic conversions, some tools support higher color ranges, though results vary significantly depending on the image. Experimenting with this setting is one of the fastest ways to improve your output quality.
5. Remove the Background Before Uploading
One of the most common reasons vector conversions look messy is that the converter is spending its tracing effort on a complex background rather than the main subject of the image. Removing the background before vectorizing allows the converter to focus on the shapes and colors that actually matter.
Many free tools can remove backgrounds automatically. Once you have a clean subject on a transparent or solid-color background, your converter will produce much tighter, more useful paths. This step alone can transform a mediocre conversion into a professional-looking result.
6. Choose the Right Output Format for Your Use Case
SVG is the default choice for most web and digital projects, but it is not always the right format. If you are preparing artwork for print, EPS or PDF vectors are generally preferred because they integrate better with professional print workflows and support CMYK color profiles. If you are exporting for use in a cutting machine like a vinyl cutter or laser cutter, some machines have specific format requirements that may differ from general web standards.
Before you start converting, know where the file is going and what format is expected. This will save you from having to redo the conversion after the fact.
7. Do a Quick Node Check After Conversion
Even the best online converters sometimes produce vector files with unnecessary complexity, including hundreds or thousands of anchor points that define shapes which could be drawn with far fewer. This extra complexity makes files harder to edit and slower to render. After downloading your vector file, open it in a vector editor and check the path complexity.
Most vector editors have a “simplify path” or “reduce nodes” function that can clean up over-engineered paths automatically. Running this step after every conversion takes less than a minute and can significantly improve how usable the file is for editing or animation.
8. Match the Tracing Method to the Image Type
Different types of images respond better to different tracing approaches. Line art and simple illustrations do well with high-contrast, low-color-count tracing. Logos with flat fills convert cleanly with standard color tracing. Photographs require a more nuanced approach, often called “photographic tracing,” which attempts to capture gradient and tonal information using many layered color shapes.
Understanding which method matches your image type will help you choose the right tool and the right settings from the start, rather than trial-and-erroring your way through multiple failed exports.
9. Test the Output by Scaling It Up
The whole point of converting to a vector is scalability. After you download your converted file, open it in a browser or a vector editor and zoom in significantly, or try scaling it to a very large size. This is the quickest way to evaluate whether the conversion was successful. Clean vectors will look crisp and sharp at any zoom level. If you see pixelation, you may have accidentally downloaded a rasterized preview instead of the actual vector file.
It is also worth checking the file extension. A true SVG file should end in .svg and should be readable as plain text in a code editor, since SVG is an XML-based format.
10. Know When to Use a Professional Service Instead
Online converters are excellent for logos, icons, simple illustrations, and images with clear shapes and limited colors. They are not always the right tool for complex photographic conversions, brand identity work, or situations where pixel-perfect accuracy is critical. In those cases, manual vectorization by a skilled designer may be the better investment.
That said, for the vast majority of everyday use cases, the online tools available in 2026 are genuinely impressive. Using a quality converter with the right preparation steps will get you professional results without the professional price tag.
FAQ: Converting JPEG to Vector Online
What is the difference between a JPEG and a vector file, and why does it matter for quality?
A JPEG is a raster image, which means it is stored as a grid of individual colored pixels. When you enlarge a JPEG, you are essentially stretching those pixels, which causes blurring and pixelation. A vector file stores image data as mathematical instructions for drawing shapes, curves, and lines, which means the image is redrawn at whatever size it needs to be without any loss of sharpness. For anything that needs to be reproduced at multiple sizes, such as logos, icons, and print graphics, vector files are the professional standard. The conversion from JPEG to vector is called tracing or vectorization, and when done well, it produces a file that is infinitely scalable and far easier to edit.
Are free online JPEG to vector converters actually good enough for professional use?
For many use cases, yes. Free and low-cost online converters have improved significantly over the past few years, and tools with solid tracing algorithms can produce clean, usable vector output for logos, simple illustrations, and icons. The main limitations of free tools are file size caps, reduced output format options, and less control over tracing parameters. For professional print work or brand identity projects where precision is critical, you may find that a paid tool or manual vectorization by a designer produces better results. However, for most digital use cases, a good free converter with proper image preparation will get you where you need to go.
What file formats should I export when converting a JPEG to a vector?
The right format depends on how you plan to use the file. SVG (Scalable Vector Graphics) is the best choice for web use because it is natively supported by browsers and can be embedded directly in HTML. EPS (Encapsulated PostScript) is widely used for print production and is compatible with most professional design applications. PDF vectors work well for both print and sharing, as they preserve vector data while being easy to open on any device. If you are using the file in a design application, AI (Adobe Illustrator) format may also be useful if your converter supports it. For cutting machines and laser cutters, DXF is often required. Knowing your destination format before you start will help you choose the right converter.
Why does my vectorized image look blocky or have jagged edges?
Jagged edges and blocky shapes in a converted vector are usually the result of one of three issues. First, the source JPEG may have been too low in resolution or too heavily compressed, giving the converter poor edge data to work with. Second, the tracing settings may be set to a low detail level, causing the converter to oversimplify curved paths into straight lines. Third, the image may have gradients or soft shadows that vectorizers handle poorly without specialized settings. The fix is usually to start with a better source image, increase the path smoothness or detail setting in your converter, and remove gradients or complex backgrounds before tracing. For images with soft edges, some tools offer a “smooth” or “curve fitting” option that helps reduce jagginess.
Is there a tool that can help me check the print readiness of my vector files after conversion?
Once you have your SVG or EPS file, it is worth validating it before sending to print. For SVG files used in web or digital contexts, the W3C offers a free SVG validator at validator.w3.org that checks your file’s markup for errors and compliance. For print workflows, your print provider or reprographics service will typically preflight the file using professional tools that check color mode, resolution of embedded elements, bleed, and other print-specific requirements. Always ask your printer what format and color profile they prefer before converting, as different printers have different specifications.
Conclusion
The landscape for online JPEG to vector conversion in 2026 is genuinely strong. Whether you need to scale up a logo, prepare artwork for merchandise, or adapt an image for web use, there are accessible, browser-based tools that can deliver quality results without requiring professional software or design skills. The keys to success are starting with a clean source image, choosing the right converter for your use case, and taking a few minutes to prepare your file before uploading.
For most everyday vectorization needs, a well-chosen online tool combined with the tips in this guide will get you professional-quality output quickly and without unnecessary cost. As with most design tasks, a little preparation goes a long way, and understanding how the technology works helps you make smarter choices at every step of the process.